|
Step
1 : Footing trench.
- Dig
your trench usually twice
- the width
of the stones you are
- using. Dig
your trench a minimum
- of twice
the height of your stone.
- The trench
should be deep enough
- for a footing
and the to be able to
- keep your
first row of stones below
- the existing
grade.
-
-
-
-
-
-
-
-
-
-
|
 |
- Step 2 : Footing.
-
- Install a compactable type gravel for
- a footing/leveling pad. The thickness
- of this footing is determined by the height
- of the wall. The width of this footing
- should be 1 1/2 to twice the depth of the
- stone you are using.
-
-
-
-
-
-
-
-
-
-
-
-
-
|
 |
|
Step 3 : First row of stones.
-
- Install your
first row of stones
- true and level on top of your footing.
- Take your time on this process, it is
- the most important part of the wall.
- If this row is not level it will play
- havoc with the wall as you stack
- each successive row of stones.
-
-
-
-
-
-
-
-
-
-
|
 |
|
Step 4: Backfill first row.
-
- Backfill around this first
row of
- stones with the same compactable
- gravel you used for the footing.
- Make sure to fill voids between stones.
-
-
-
-
-
-
-
-
-
-
-
-
|
 |
|
Step 5: Start stacking.
- Stack each successive row according
to the manufacturers specifications.
- Also install a layer of clean gravel
- behind the stone. On shorter walls, just a filtration
fabric between the dirt and the wall will suffice. Then start
backfilling with dirt. You should compact the dirt fill as you
progress
- up the wall.
-
-
-
-
|
 |
|
Step 6: Geogrid layers.
- If geogrid
is required. The install it
- in the rows specified and to the length
- specified by the manufacurer of the
- stone product you are using.
-
-
-
-
-
-
-
|
|
|
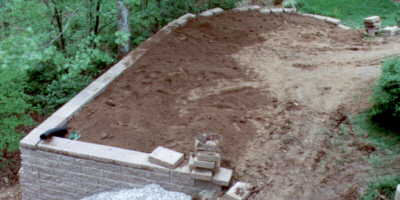
Step 7: Caps and final fill.
- Install the cap stones
if that is what
- the stone product specifies. Finish the
- fill with dirt.
-
-
-
-
-
-
|
 |
|
Step 8: COMPACT.
- Remember, you
should be compacting the dirt fill as you
- continue up the wall.
-
-
-
-
-
|
 |
|
Step 9: Install plant material.
- Install whatever plant
material you
- desire. Sod or grass seed if its to be a
- lawn. Other plant material if its to be
- a planter bed.
-
-
-
-
-
-
-
-
-
-
|
 |
|
Step 10: Enjoy
- Enjoy your newely built wall. You have done a good job.
|
 |
 pes
pes