pespes

|
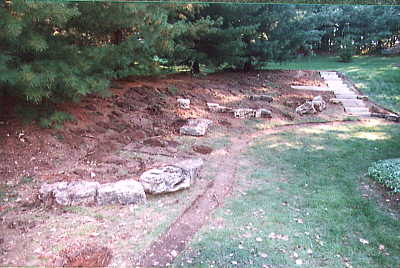
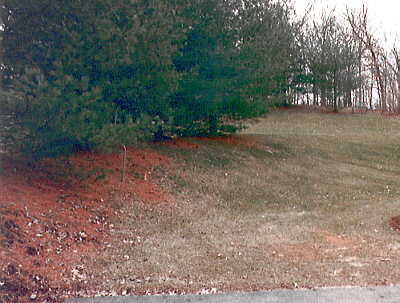
Step 1: Find a location. The location should be a hillside or an area with a slight slope.
|
|
|
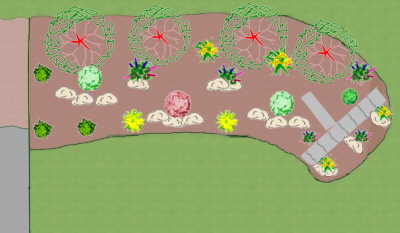
Step 2: Draw your design. Your design should incorporate the plants and the boulders. Take into consideration the sun/shade conditions of the site.Also consider the eventual size of the plants before you install them.
|
 |
|
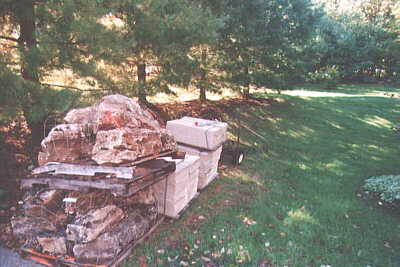
Step 3: Aquire the materials. If you are lucky enough you can get the materials delivered to the site to be landscaped.
|
 |
|
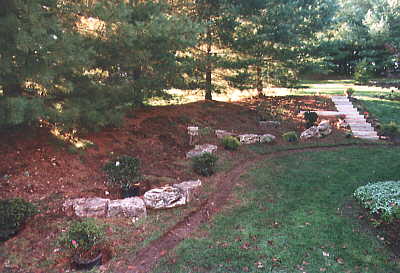
Step 4: Install the hardscape. The landscape shown also includes the use of limestone slabs for a stairway. They should be installed beginning with the bottom slab. It should be true and level with a slight pitch downward toward the front of the stone for water runoff.
|
 |
|
Step 5: Continue Hardscape. Continue building the steps up the hill untill you have finished them.
|
 |
|
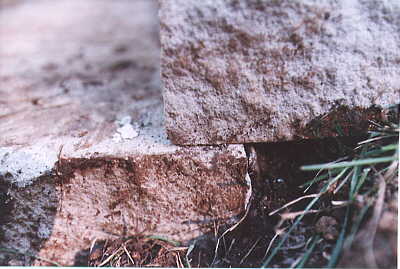
Step 6: Continue Hardscape. When installing slab steps be sure to overlap the slabs a minimum of 1inch(25mm).
|
 |
|
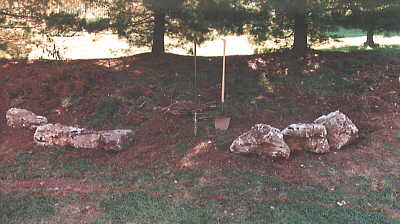
Step 7: Install the boulders. Now install the boulders. They may look out of place. The plants and dirt fill make the boulders and the whole landscape look natural.
|
|
|
Step 8: Plants. Now lay out the plants in the places you wish to install them. This gives you a chance to make minor adjustments in their placement.
|
 |
|
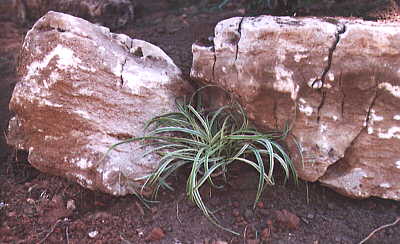
Step 9: Plants. Planting in the nooks and crannies of the boulders helps make the boulders look more natural. Then install the rest of your plants. Fill with dirt where needed .
|
|
|
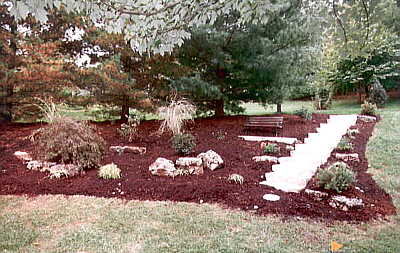
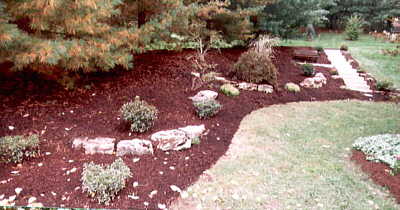
Step 10: Mulch and Relax. Install mulch over the landscape to a minimum depth of 3 inches(76mm). Then sit back and relax. If you have properly designed the plantings. It will look sparce at the beginning. The plants will mature and fill in as they should. You will have years of low maintenance enjoyment from your new rock garden. |
|
Landscape designed and installed by lotf, all photos taken by and owned by lotf.com
copyright 2000.
Any commercial use of these photos without the express written concent of lotf.com is prohibited.